| MikeInside's Dummy Stairs |
Don't let the name fool you, these Dummy Stairs are actually pretty clever :p Unlike my last Internal Stairs tutorial, this one will allow you to have flat areas surrounding the stairs. It is quite an advaced tutorial, so I recommend you try some of the easier ones first. If you would like to learn more about what you can do with dummy levels, check out this: Dummy Levels for Dummies Guide 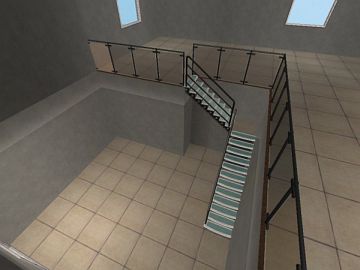 This is what I am going to show you how to create. Excited? Well probably not, this is like my billionth stair tutorial, but lets do it anyway :p 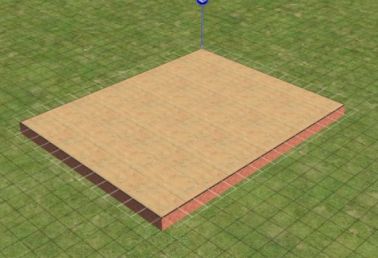 1) Lets start off by creating a big ol' slab of foundation like shown. The bigger the better, it'll make any mistakes easier to spot. 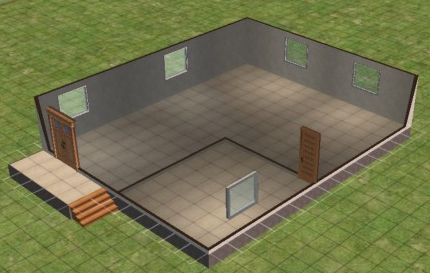 2) Create walls around the border of this foundation, then create a room in the corner like shown. I have painted the walls and added some windows, but you dont have to worry about that, its just for looks. If you place a door, make sure it is not near the corner of the room, that is where our stairs will be put. 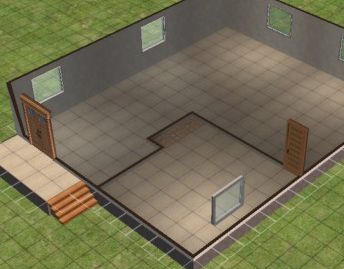 3) Create a 3x1 square dent in the corner of your room. 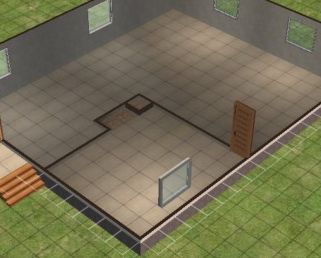 4) Now add 2 walls, to turn the corner into a small 1x1 room. This will be where we add the landing for our stairs. 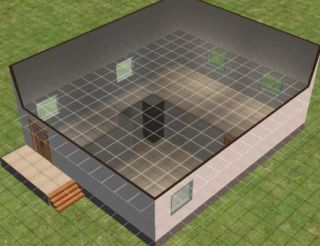 5) Go up one level, and create a big room. This will be our "dummy-level." So dont add any windows to this level, it is going to be shrunk. 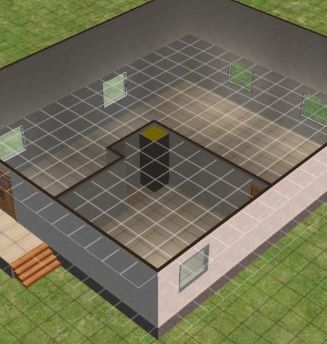 6) Trace over the bottom room's walls with the wall tool, then add a single peice of floortile to corner of the room to turn it into the landing. 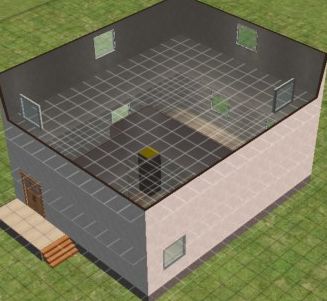 7) Go up another level, and surround it with walls. You can add windows if you want. When we are finished, this will look like it is just one level above the bottom, when actually it is two. 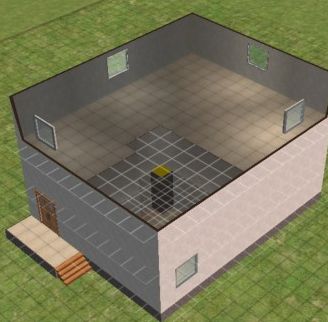 8) Add floortiles everywhere except for above our corner room. Dont put any above the landing either! 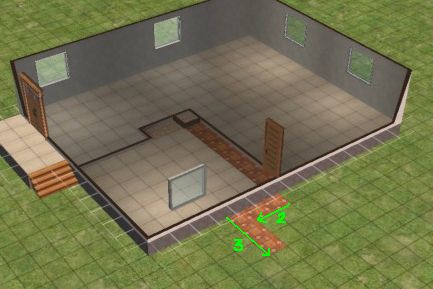 9) Go all the way back down to our first floor. Now from where the edge of our room stops, drag a strip of floor tiles to the left, and then away from the house, to create an L-shape. Its kinda hard to explain this step in words... so just copy the screenshot :p 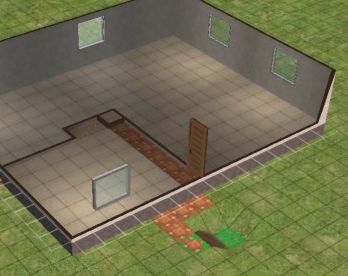 10) With the connecting stairs tool, make a hole in the ground that starts from the edge of the "L" like shown. 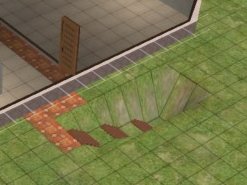 11) Add 2 more sets of stairs following eachother, to make the hole even deeper.  12) By holding down the CTRL key, delete the connecting stairs. The stairs are gone, but the hole remains ;) 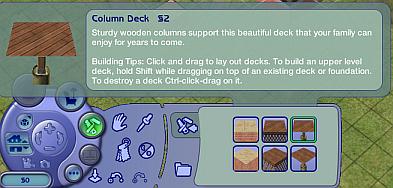 13) Select the 3rd type of foundation, the column deck. 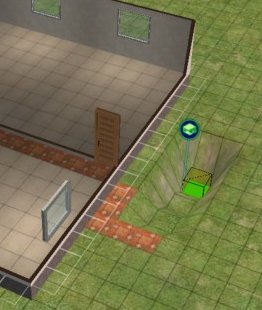 14) At the base of this hole, place a single square of foundation. 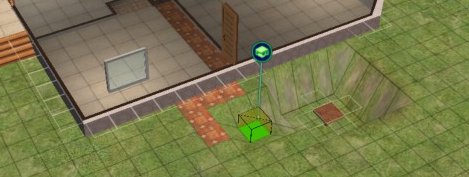 15) Now place another square of foundation, that is one square away from our "L" shape. 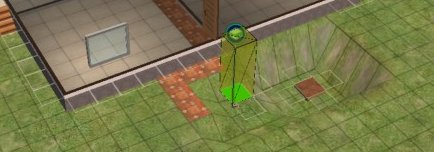 16) With the foundation tool still selected, hold down the SHIFT key. It will allow you to place this foundation on top of itself. 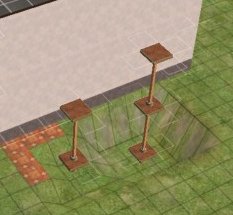 17) Repeat this process, so that you have a 2 level high scaffolding on the left, and 3 level high scaffolding on the right. Next, you will need to turn on a building cheat. Here is how to do it: To enter in cheats, press and hold down CTRL, SHIFT and C. You should see a small white box appear in the top left corner of the screen. Type in boolProp constrainFloorElevation false and press enter. This will allow you to change the height of things you wouldnt normally be able to. 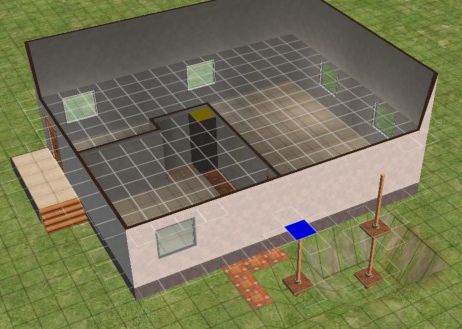 18) Go down a level (to our "dummy level," the one without windows.) Select the flatten terrain tool. 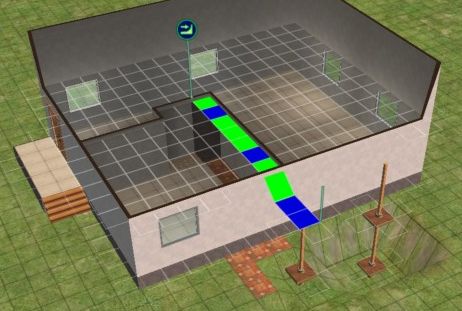
19) Drag the flatten terrain tool from the top of our foundation, all the way to the landing. If you have followed the tutorial correctly so far, it should line up perfectly. 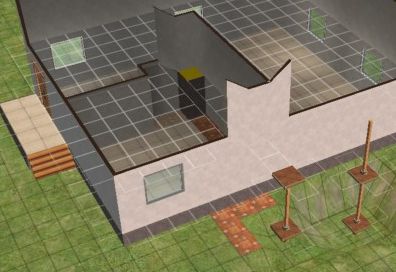
20) When you let go, you will notice the yellow landing has been lowered. If the walls will look wierd like in the pic, just go down into walls down mode for a sec, and they will go back to normal. 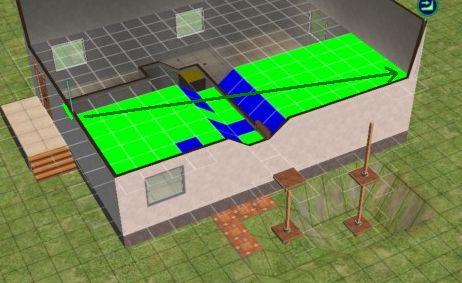 21) One square away from the edge of your wall (that is important) drag the flatten terrain tool all the way to the other side of the room like shown. 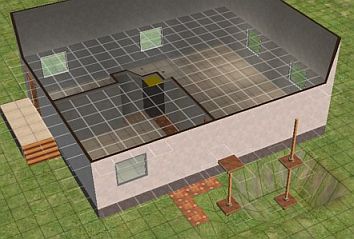
22) It should now look like this, with the landing slightly lowered, but everything else pretty much normal. 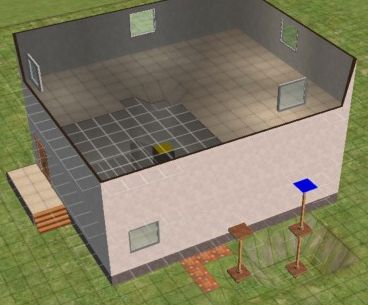
23) Go up a level. We are now going to squish the level below, read on to see how! 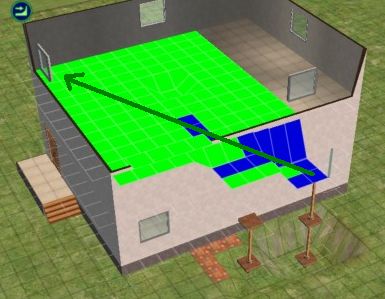
24) Once again using the flatten terrain tool, drag from the foundation to the corner of the large room. 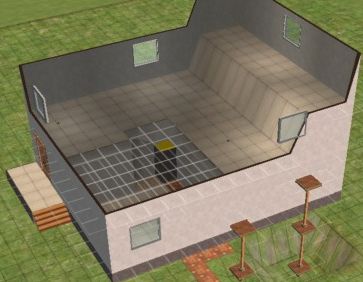 25) Half of the room is squished, but some of it probably isnt. 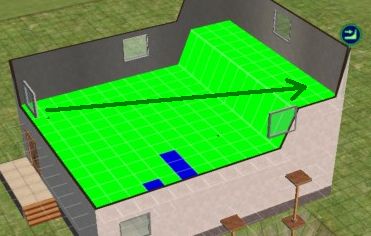
26) To fix the rest of the room, drag from the lowest part to the highest part, covering the whole room. (The direction you drag is important.)  27) Looking good! The hard part is over, so if you have gotten this far, you have done well :) Now would be a good time to turn off the cheat by hitting CTRL-SHIFT-C and typing: boolProp constrainFloorElevation true 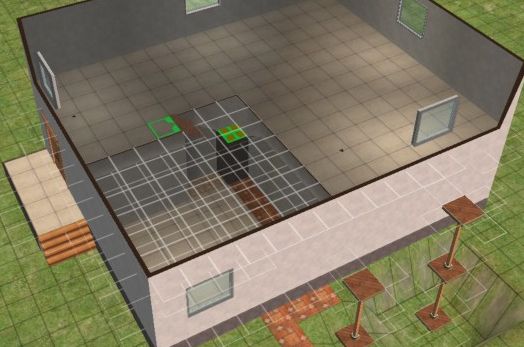 28) Using the connecting stairs tool, you should be able to connect the top level to the landing below. 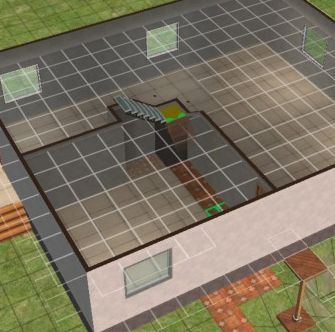 29) Go down a level, and once again use the connecting stairs to join the landing to the ground floor. 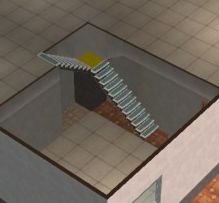 30) Your stairs are finished! Now all thats left to do is remove some of the junk that was created while we built them. 
31) Once again, select the column deck tool. Hold down the CTRL key, and drag along the top of the foundation to remove it.  32) Finish removing all the foundation pieces. 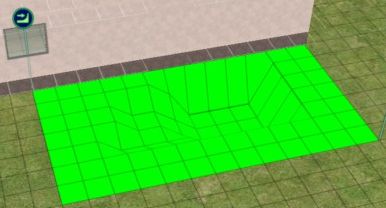
33) Use the flatten terrain tool to remove the hole in the ground.  Tada! Your dummy-level stairs are complete! Time for you to take over, and see what you can come up with using this technique :) 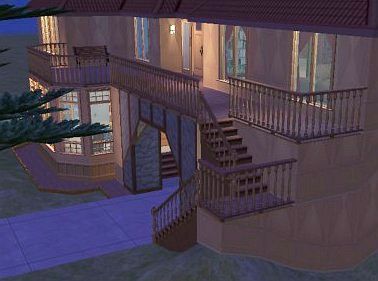 As an example, I used the dummy stair technique to create this deck for my Aneuri house. Comments? you can contact me by clicking here. |
<- Back to Sims 2 Content Listing